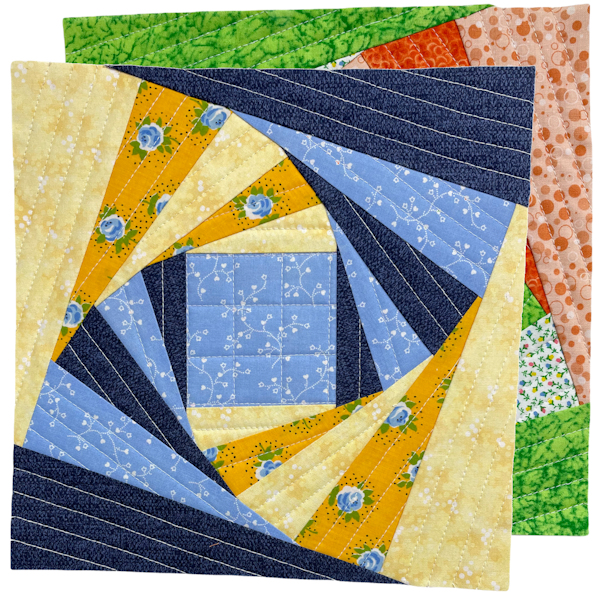
Twisted Log Cabin

Designed by Julie A Bolduc
Using the Kouché Method formerly the Quilt as You Piece MethodThis is the 19th quilt block tutorial in a series on how to make quilt blocks using the Kouché Method formerly the Quilt as You Piece Method. This quilt block can be completely made in the Quilt as you Piece method. This block works best if you cut the exactly as indicated in the cutting chart and use a scant quarter inch seam allowance.
- Materials Needed Makes one Block:
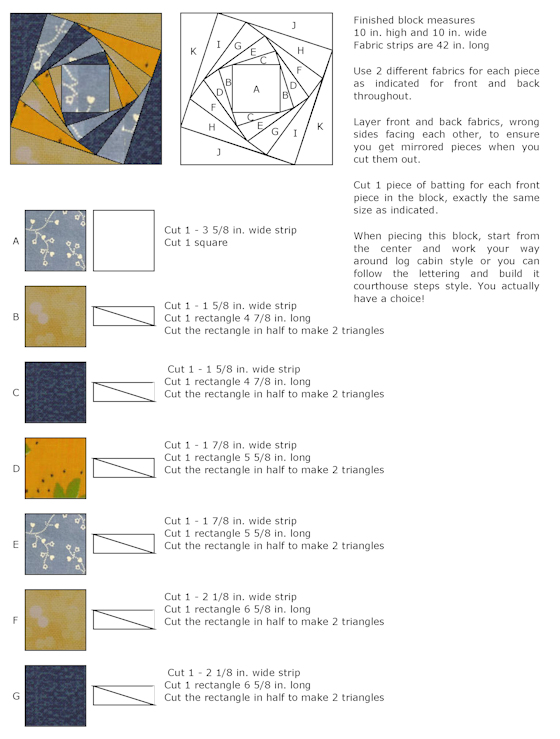
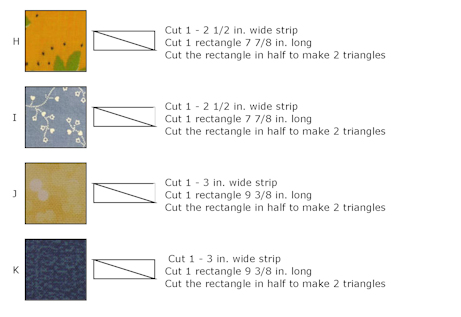
- Fabric: Follow the diagram for the sizes.
- Batting Follow the diagram for the sizes.
- Cotton Sewing thread in neutral color, 50wt preferred.
- Washable Liquid Glue
- Washable Glue Stick
- Tools Needed
- Rotary Cutter & Cutting Mat
- Pair of Fabric Scissors
- Temporary Marking Device
- 18"x3" quilt ruler
- 10.5"x10.5" Square Ruler
- Dry Iron & Pressing Board
These are the tools I used. Use what you have.
- Instructions
- Follow the sizes for cutting your pieces but make the I pieces bigger than indicated so you will have something to trim as you go and at the end.
- You can cut the batting pieces bigger if you like. They can be trimmed as you piece.
- Use the Quilt as You Piece method for all pieces. Quilt as you add each piece or wait until the block is complete.
- Trim your batting & square as you go, after adding the 4 pieces to make a square.
- After layering and quilting the center square, trim it to 3 3/8" x 3 3/8".
- Trim the square after adding pieces B & C to 4 1/2" x 4 1/2"
- Trim the square, after adding pieces D & E to 5 1/2" x 5 1/2".
- Trim the Square, after adding pieces F & G to 6 3/4" x 6 3/4".
- Trim the Square after adding pieces H & I to 8 1/2" x 8 1/2".
- Trim to 10-1/2" x 10-1/2". Do stay stitching, an 1/8" in from the edges, all the way around.
Design written on January 3, 2022 by Julie A Bolduc © 2022 by Julie A Bolduc p401015
This pattern sheet just provides what materials you need and what size pieces you need to make a 10" block and in what order to sew the pieces of the block together. It does not go into complete detail how I put them together in the Quilt as You Piece manner, please refer to our tutorial of the Five Strip Rail Fence Block for the basic concept and instructions on how to do Quilt as You Piece for this block and all other blocks in this series.
Block Name & Design Disclaimer: Block Name & Design Disclaimer: This block has been around for a long time. I did not design the block but the block is in the public domain. The method I am using to put this block and other blocks together is out of my head. It is ok for me to use in this manner.


