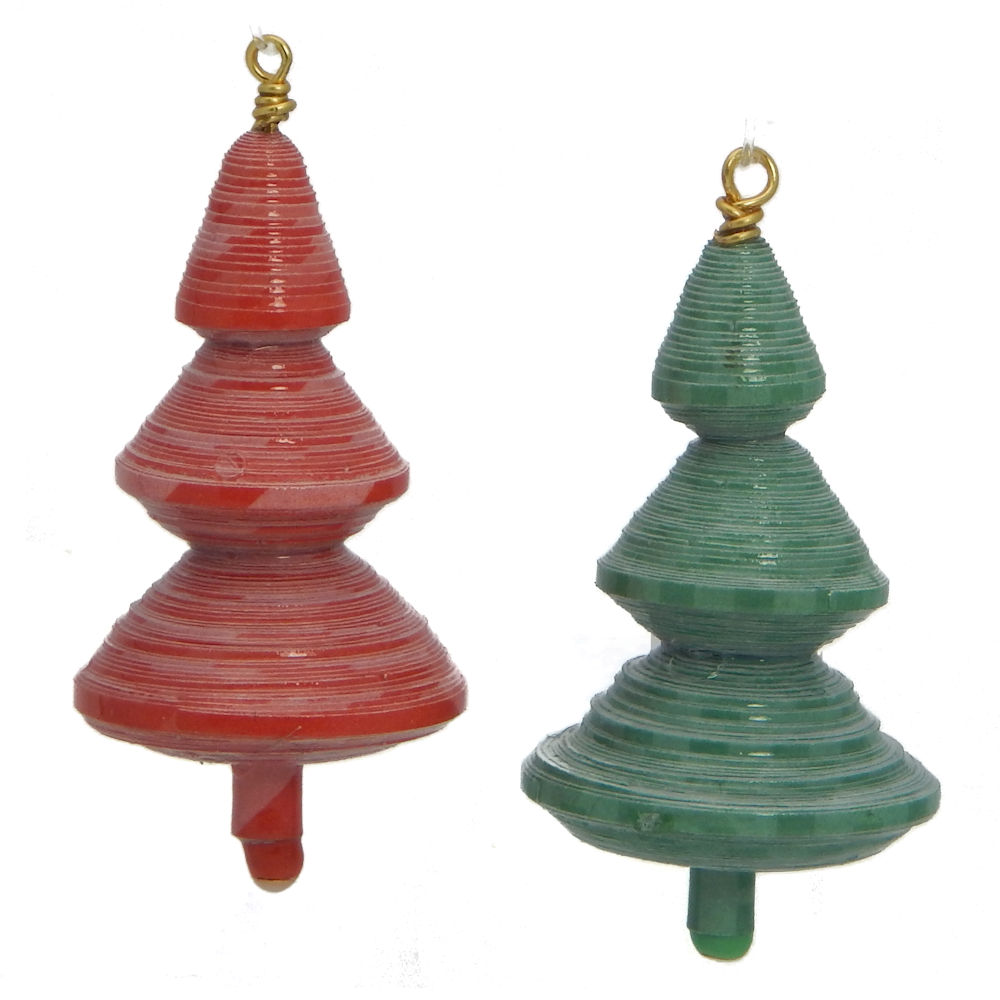
Paper Bead Christmas Tree Ornament

Designed By Julie A. Bolduc
This little tree ornament is made with 3 large paper beads and one small one, placed on a long head pin and then glazed after it is assembled. It is fun to make and would be a great addition to anyone's Christmas Tree!
- Materials Needed Per Tree
- 1 Sheet Good quality printed card stock 8-1/2" x 11" The heavier your card stock, the bigger your beads will be.
- Cutting Template, included in this project on the download page.
- White Glue
- 1 Head Pin 4" long any color
- 1 size 6/0 Seed Bead in color to match Card Stock
- Glazing Supplies
- Tools Needed
- Paper Cutting Tools
- Mini or small binder clips
- 5/64" paper bead roller
- Wire Cutters
- Round Nose Pliers
- Glazing Tools
Finished Size: Approximately 2.25" x 1.125" before glazing
Skill Level: Intermediate
Instructions
Step 1: Cut your strips out using your template. Separate the strips following the color map into 3 bundles. Clip each bundle together with small binder clips. I like to include the trunk piece with the 2 top pieces just too keep the strips organized. If you are making several trees like I did, make a bundle of each of the 3 bundles by using a larger binder clip on the side of the bundles of strips put together. I made over a dozen trees and separating the strips and bundling them together according to the map kept them organized so I would not mix them up. It was a major time saver. I used my Pazzles cutting machine to cut out the pieces but you can use whatever you need to cut them.
Step 2: Roll the trunk piece and set it aside.
Step 3: Roll the top section of the tree. There are 2 strips. Start with the larger one then butt up the 2nd one to the first one while rolling. Glue the end in place. Do not put glue anywhere else. You want to be able to adjust the bead as needed.
Step 4: 2nd Section. Roll the 2nd section starting with the short straight piece. This is the core. There are 6 pieces to the 2nd section. Roll up all of the following 5 strips in descending order butting each strip to the previous one as you go. Again, only glue the ends in place as you go so you can adjust as needed. When you get to the last and smallest strip, you might want to glue that one completely as you go to stabilize the bead.
Step 5: Roll the bottom section of the tree the same way you did the 2nd one but this time there is a long straight piece to roll first. This is the core. Then add each strip as you go. There will be a total of 10 strips in all including the core. Again, glue the final strip all the way but only glue the ends of the previous strips so you can adjust as needed.
Assemble the TreeStep 5: Pick up your head pin and the size 6/0 seed bead. Place the seed bead on the head pin first. Then following it with the bottom, middle and top of the tree in that same order.
Step 6: Make a wrapped loop at the very top to make the tree's hanging loop. This is the most secure way of making a loop for hanging.
Step 7: Glaze your tree. I find the best way to glaze your tree is to dip it. Attach either an ornament hanger or fishing line to your hanging loop and dip it into the glaze you are using. I am using 2 coats of PC-Petrifier and 2 Coats of Liquid Laminate. You can use what ever you are comfortable with.
Final Note About Glazing You can glaze your beads separately if you like and then assemble them but I find glazing them after assembly glues the parts together and makes a more stable solid tree.
Design written on Sunday, September 27, 2015. Copyright ©2015 By Julie A. Bolduc f201004

