
Make Paper Bead Drying Blocks

A lot of people, including me, who make paper beads, string them onto string or wires then dip them. To be honest, this page is about how I glazed and dried my beads for many years. The beads look great whether they are dipped in a thin glaze 4 or 5 times or if they are glazed individually, with one or 2 coats, with a thicker brush on glaze and allowed to dry without touching each other. I used drying blocks and toothpicks to dry most of my beads. Well the beads that have a 1/16" hole in them that is. Since I first wrote this page, I have since gone from glazing my beads using these instructions to stringing them on fishing line and dipping them and hanging them vertically on a paper bead drying rack I made. If you want to glaze your beads one at a time, this is the way I used to do it!
I find stringing the beads on 50lb test fishing line, dipping and hanging them a few times, allowing them to dry an hour between coats, is actually faster and more efficient in the long run then brushing on 2 coats of a thicker glaze one bead at a time. You can do other things during the hour of drying time between coats.
You can use various things for drying your beads after they have been glazed. The thing I used almost all of the time were foam blocks that came from packaging materials for assemble yourself furniture. They are free and they are really easy to use. Of course if you don't have any, you could go to your local craft store and buy a sheet of thick plastic foam. That will work just as well. You can use pieces of rigid foam insulation as well. It comes in different thicknesses but the one I found that works well enough is the one that is about 1" or ¾" thick. You really do not need it to be thicker than that. You can also use the back side of empty meat trays from the grocery store.
I used to make my beads with just a 1/16" but now I make them with 5 different sized holes. That is why I switched to dipping my beads strung on fishing line. The beads with a 1/16" hole in them which is just the right size to put on a round toothpick. Then the toothpick can be inserted into the foam block. For larger sized holes, you can use skewers, and caramel apple sticks or dowels that have been cut and sharpened with a pencil sharpener.

Foam
Any type of foam blocks will work.
Pink or green sheet insulation, which comes in varying widths and lengths at home improvement centers. You might be able to get some scraps if you know of someone who is building something and is using this type of insulation.
Pressed foam packaging blocks that can be found in shipping boxes that computers and other electronics come in.
Or you can buy a sheet of thick craft foam and cut it into smaller manageble blocks.
Then all you need to do is while you make the beads and glaze them, you just need to put each bead on a toothpick or other stick and stick into the foam block and let the bead dry. If you find that your beads stick to the toothpicks, you can coat them with a mixture of one part mineral oil and 3 parts bees wax that has been melted together, poured into a plastic container with a lid and allowed to cool. This is the same consistency as Chapstick.
After time, the foam blocks will be so riddled with holes it will be hard to use them so it will be time to get new ones, or make some permanent ones from wood which is explained below.

Wood Blocks
I have 5 drying blocks, one for each hole thickness of beads I make. The 1/16" drying block is shown in the picture. The holes are the perfect size for sticking toothpicks into. I used a 1/16" drill bit to drill the holes 5/8" apart in a grid pattern. You can use the template below as a guide. As of updating this page, I actually use a 5/64" paper bead roller instead of a 1/16" paper bead roller. Toothpicks still work for this size but I still prefer stringing them on fishing line and dipping them.
You can make your holes farther apart if you plan to make fatter beads.
Below you will find a template you can use to mark your holes in your wooden block if you want to make one.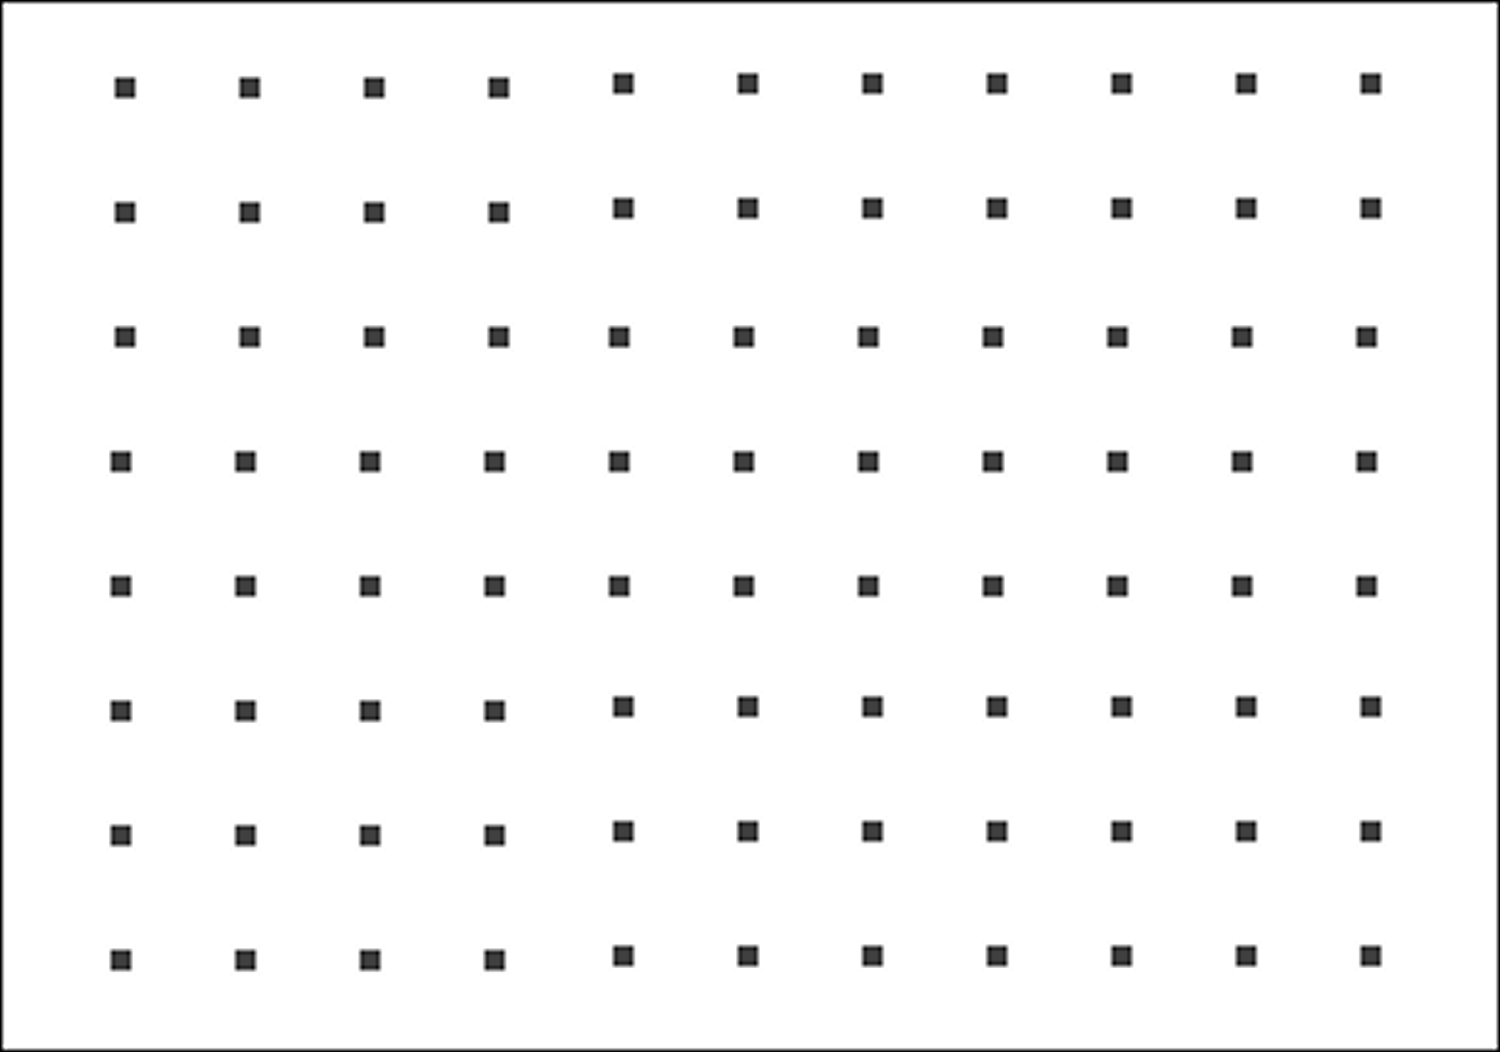
Design Written on July 2, 2013 Copyright ©2013-2023 by Julie A Bolduc p600000
Sheetworks Studio Version 2.5 — Free Download! - Two New Categories Added, Graph Paper and Quilt Blocks
All items in our online shop ship free within the US only. I currently offer U.S. shipping only and it is from rural Maine. Delivery can vary from 2–14 days depending on your distance from Maine. Expedited shipping is not available.
Please note: I am now selling all of my paper bead making tools and other items from this web site using Paypal payments.
I have removed all of my paper bead making tools from Amazon. My Kindle crochet pattern books and paper template paperback books continue to be available on Amazon, as they are printed and fulfilled directly by Amazon. A limited number of paper bead making tools remain available on Etsy but I am not linking to those tools from this site.
Random Quick Tip!
Glue Basting FabricYou can use Elemer's Glue Stick, the kind that starts out as purple and drys when clear, to baste fabric layers together when working on small projects. Even when heat setting, when you dry it with an iron, it will wash out completely when washed in the washing machine. You can also use any glue stick that is meant for kids, that washes out of clothing for basting.