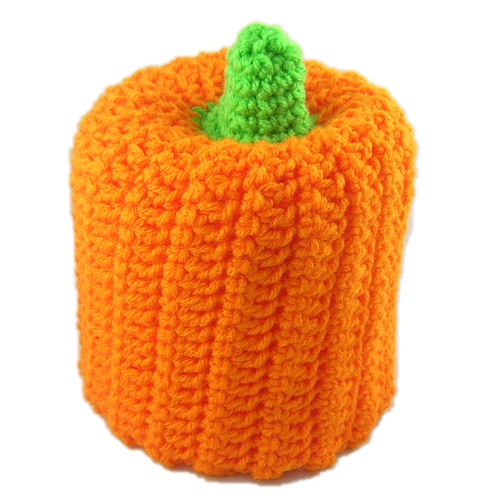
Pumpkin Bath Tissue Cover

Designed by Julie A Bolduc
This crocheted pumpkin Bath Tissue Cover is fast and easy to make and can be completed in an evening. If you would like to make it into a stuffed pumpkin instead, just gather up the bottom edge tight but stuff before closing. This pumpkin is made in rows first, then the stem is done in rounds after the rows are stitched together.
Materials Needed
1.5 oz Worsted weight acrylic yarn in Pumpkin. Red Heart Super Saver was used in the example
Scrap worsted weight acrylic yarn in Spring Green. Red Heart Super Saver was used in the example
Size H/8 or 5mm aluminum crochet hook
Yarn needle for weaving in ends and gathering up top of stem.
Yarn Thickness: 4mm
Gauge: 4dc=1"
Finished Size: Fits a full size roll of bath tissue
Skill Level: Beginner to Intermediate
Decrease: Pull up a loop in each of the next 2 stitches, yo, pull through all 3 lps on hook.
Instructions
ROW 1: With pumpkin, ch24. Slst in each of the first 3 chs from hook. Sc in each of the next 20 chs. Ch3, turn.
ROW 2: Sk very first sc. Dc in each of the next 19 sc. Slst in each of the 3 slsts. Ch1, turn.
ROW 3: Working in back lp only all the way across this row, slst in each of the 3 slsts. Sc in each dc across. Ch3, turn.
ROW 4: Working through both lps on this row, Sk very first sc. Dc in each of the next 19 sc. Slst in each of the 3 slsts. Ch1, turn.
ROW 5-38: Repeat ROWs 3 & 4 consecutively. You should end with a dc row. Do not fasten off. Fold work lengthwise lining up row 1 with row 38, so the sharp ridges are on the outside. Work a slst in each st across working through 1 lp on the first and last rows at the same time. Fasten off and weave ends into back of work. Turn work right side out so the ridges are now on the inside.
Stem:
RND 1:Join green in any st at top of pumpkin, the edge where the slip stitches are. Ch1. Sc in same st as joining. Work a total of 20 more sc around. Join w/slst to first sc. (17sts.)
RND 2: Ch1, sc in same st as slst. Sc in each of the next 2 sc. Decrease 1. Sc in each of the next 3 sc, decrease 1, 4 times. Sc in next sc. Join w/slst to first sc. (17sts)
RND 3: Ch1, sc in same st as slst. Sc in each sc around. Join w/slst to first sc.
RND 4: Ch1, sc in same st as slst. Sc in next sc. Decrease 1, sc in each of the next 2 sts, 3 times. Decrease 1. Sc in next sc. Join w/slst to first sc. (13sts)
RND 5-7: Ch1, sc in same st as slst. Sc in each st around. Join w/slst to first sc.
RND 8: Ch1, sc in same st as slst. Decrease 1, sc in each of the next 2 sc, twice. Decrease 1. Sc in next sc. Join w/slst to first sc. Fasten off leaving an end about 8" long. Weave this end through the last round and gather up tight. Then weave the end into work and trim off any excess.
Weave all other ends into back of work. Place over bath tissue roll.
Design written on Sunday, September 21, 2008. Copyright ©2008 By Julie A. Bolduc f122003

