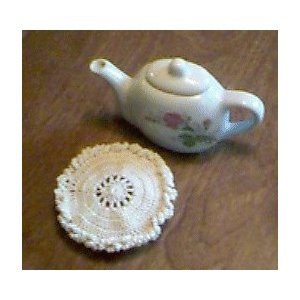
Deep Dish Apple Pie Sachet

Designed By Julie A. Bolduc
This little pie is almost good enough to eat but don't! It is crocheted! But it smells like the real thing cause it has apple peels and spices in it! Really Yummy! It is just something nice to put into your kitchen and have sitting next to your stove.
Materials Needed:
2¼"diameter cardboard circle cut from a cereal box.
Peelings from 2 medium Macintosh apples
¼ tsp ground Cinnamon
¼ tsp ground nutmeg
Tin pie plate
Small amount bedspread weight crochet cotton in ecru. Size 10.
Knit-Cro-sheen was used.
Size 7 steel crochet hook
Tapestry Needle
Yarn Thickness: 10thread
Gauge: 10sc=1"
Finished Size: =2½" diameter
Skill Level: Intermediate
Special Stitch Instructions
Citrus Stitch (cit)
Ch5, insert hook in 2nd ch from hook, pull up a lp, *insert hook in next st and pull up a lp. Rep from * 2 more times. Yo and pull through all 5 lps on hook. Ch1 to close.
Instructions
Tear up the apple peelings into small peices and place them in the tin pie plate. Sprinkle the spices on top and stir all together. Place pie plate into oven and allow the peelings to dry overnight. Or You can turn the oven on to 200 and cook for about 3-4 hours. My apple peelings dried in about the length of time it took to crochet the parts. You can use a dehydrator also. Just follow the manufacturer's instructions. This is the filling for the sachet. When completely dry, break them into smaller pieces if needed.
RND 1: Ch4, join w/slst to first ch to form ring. Ch3, work 13dc in ring. Join w/slst to top of ch3. (14 dc)
RND 2: Ch3. Dc in same st as slst. Work 2dc in each dc around. Join w/slst to top of ch3. (28 dc)
RND 3: Ch3. Dc in same st as slst. Dc in next st. *2dc in next st. Dc in next st. Rep from * around. (42 dc)
RND 4: Ch3. Dc in same st as slst. Dc in each of the next 2 sts. *2dc in next st. Dc in each of the next 2 sts. Rep from * around. (56 dc)
RND 5: Ch3. Dc in same st as slst. Dc in each of the next 3 sts. *2dc in next st. Dc in each of the next 2 sts. Rep from * around. (70 dc)
RND 6: Work on the back side of the dc. Ch3. Backdc (bdc) YO Insert hook in the back of the dc then through the front going around the top of the post just under the lps at the top. Then finish the dc as usual. Work one bdc in each st around. Join w/slst to top of ch3. This gives a ridge effect.
RND 7: Ch3. Dc in each dc around. Join wslst to top of ch3. Fasten off.
Place the cardboard circle inside the plate then set aside.Top "Crust"
RND 1: Ch4, join w/slst to first ch to form ring. Ch3, work 13dc in ring. Join w/slst to top of ch3. (14 dc)
RND 2: Ch4, *dc in next dc. Ch1. Rep from * around. (14dc and 14 ch1 sps.)
RND 3: Ch3, dc in same st as slst. 2dc in ch1 sp. *2dc in next dc. 2dc in ch1 sp. Rep from * around. Join w/slst to top of ch3. (56 dc)
RND 4: Ch3. Dc in same st as slst. Dc in each of the next 3 sts. *2dc in next st. Dc in each of the next 2 sts. Rep from * around. (70 dc)
RND 5: Ch3. Dc in next st and in each st around. Join w/slst to top of ch3. (70 dc) Do not fasten off. But weave all the other ends in first before continuing.
Assembly
Now to assemble the top and bottom.
Put the two pieces together as you would a pie. Lay the top onto the bottom lining up the ending knots. Work through both lps on both the top and bottom to crochet them together. Work the following (Sc, cit. Sc in next st.) 3/4 of the way around first then stuff it with the apple pie filling then finish working around. Then join w/slst to first sc. Fasten off Weave ends into work.
Designed on Sunday, September 13, 1998. Copyright © 1998 by Julie A. Bolduc p106007

