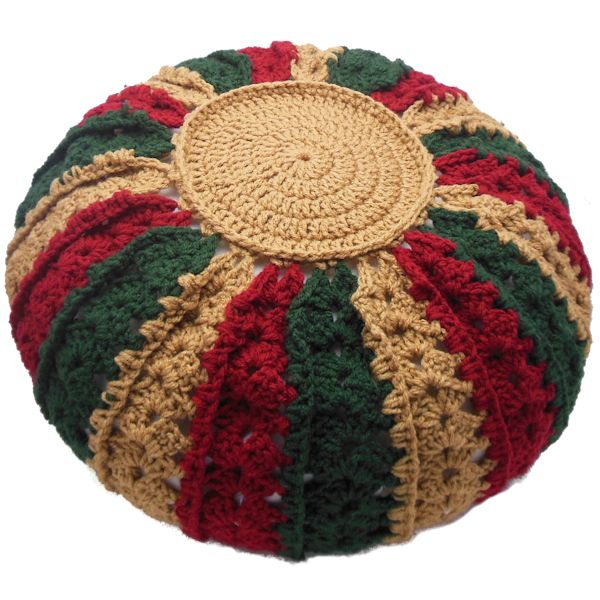
Mile-A-Minute Round Pillow

Designed by Julie A Bolduc
This pillow is made with mile a minute stripes that are joined as they are made. It is fun to make and would be a pretty addition to your bedroom set!
Materials Needed
Worsted Weight acrylic yarn in Warm Brown, Dark Sage and Burgundy. Red Heart Super Saver was used the example
Size H/8 or 5mm aluminum crochet hook
1 Round Pillow form, 18" in diameter
Yarn Needle for weaving in ends
Yarn Thickness: 4mm
Gauge: 4dc = 1" RND 1 is 1-1/2"*
Finished Size: 18" in diameter, 7" thick
Skill Level: Intermediate to Advanced
Instructions
Start with stripes. Join them as you go and when you have made 21 stripes, you will be joining the first one to the last one made to form a tube.
First Stripe
ROW 1: With Warm Brown. Ch4. Join w/slst to first ch to form ring. Ch3, 2dc, ch2, 3dc in ring. Ch3, turn.
ROW 2-17: 3dc, ch2, 3dc in ch2 sp. Dc in top of ch3. Ch3, turn. At the end of ROW 17. Fasten off for this first strip only at this point. Weave all ends in as you go.
You will not be fastening off at the end of ROW 17 for the rest of the strips. You will be joining them as you go on the ch3 spaces down the side.Second Strip
With green, repeat as for first strip but do not fasten off. At the end of ROW 17, pick up previous strip. Put them together back to back, lining up the ch3 spaces along the edge and the 2 rows 17. Working through both thicknesses at the same time, Work 2sc in each ch3 sp separated by a ch1 all the way down the side end into with 2 sc in last ch3 sp. Fasten off here and weave ends into back of work.
Third Strip
With Burgundy, repeat as for Second Strip.
Fourth through 21st Strip
Working in the same color sequence, repeat as for Second Strip. Warm brown, green and Burgundy. You will end with a Burgundy Strip. Join 21st strip to 1st strip in the same way to form into a large tube.
RND 1: Ch4. Join w/slst to first ch to form ring. Ch2. 14 dc in ring. Join w/slst to first dc. 14sts around
RND 2: Ch3, dc in same st as slst. 2dc in each st around. Join w/slst to top of ch3. 28sts around
RND 3: Ch3, dc in same st as slst. Dc in next st. *2dc in next st. Dc in next st. Rep from * around. Join w/slst to top of ch3. 42sts around.
RND 4: Ch3, dc in same st as slst. Dc in each of the next 2 sts. *2dc in next st. Dc in each of the next 2 sts. Rep from * around. Join w/slst to top of ch3. 56sts around.
Pay close attention to this next round. You are only increasing by 7 stitches instead of 14. This is so you can match how many stitches there are on the pillow where you are going to join these to.
RND 5: Ch3, dc in same st as slst. Dc in each of the next 7 sts. *2dc in next st. Dc in each of the next 7 sts. Rep from * around. Join w/slst to top of ch3. 63sts around. Do not fasten off.
Join to Pillow
Work one stitch in each st around catching the round of ch1 spaces and scs on the pillow's round from before.
Repeat 2nd circle for other side as for the first. Fasten off and weave all ends into work.
Design written on Tuesday, August 12, 2014. Copyright ©2014 By Julie A. Bolduc p119009
*To check your gauge, work the first 2 rounds of the center circle. Measure RND 1. It should be 1-1/2" in diameter.
