Chenille Granny Pillow

Designed by Julie A Bolduc
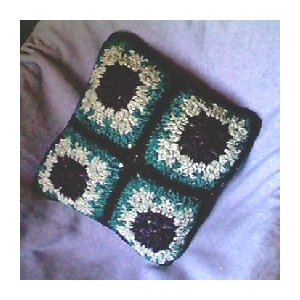
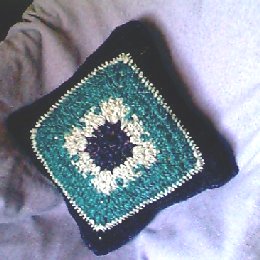
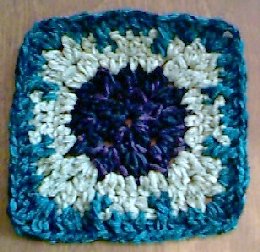
This pillow is made up of granny squares sewn together. I made it with chenille but you could use any worsted weight yarn you want. Plus you can use the individual square in any granny square exchange since it is 6"x6" in size.
Materials Needed:
4 Skeins 1.4 oz each 40 grams Lion Brand Chenille Sensations yarn.
One each of the following colors. 406 Madrid Print, 173Sage, 143 Black, 178 Teal.
Size USH8/5.00mm aluminum crochet hook
Yarn Needle
14"x14" muslin covered pillow form. If you sew, you can make your own.
Yarn Thickness: 4mm
Gauge: 4sc=1"
Finished Size:13"x13"
Skill Level: Intermediate
Starting bl (Starting Bobble): Ch2, yo, insert hook in place indicated. Draw up a lp, draw through 2 lps on hook. yo insert hook in same place, draw up a lp, draw through all 3 lps on hook.
Bl (bobble): Yo, insert hook in next place indicated, draw up a lp, draw lp through 2 lps on hook. *Yo insert hook in same place, draw up a lp and draw lp through 2 lps on hook. Rep from * one more time. Yo and draw through all 4 lps on hook.

Instructions
Front:
Motif Square Make 5 the same but when you are done with the 5th one, do not fasten off. Continue on with instructions for the back.
RND 1: With Madrid Print: Ch4, join w/slst to first ch to form ring. Work a starting bl in ring. Ch2. *Bl, ch1, bl in ring. Ch2. Rep from * 2 times more. Bl, ch1. Join w/slst to top of starting bl.
RND 2: Slst into the first ch2 sp. Starting bl, ch2, bl in first ch2 sp. Ch1. Work 3 dc in next ch1 sp. *Bl, ch2, bl in next ch2 sp. Ch1. 3dc in next ch1 sp. Rep from * around. Join w/slst to top of starting bl. Fasten off Madrid Print.
RND 3: Join sage in any ch2 corner sp. Starting bl, ch2 bl in first ch2 sp. (Ch1. 2dc in ch1 sp. 1dc in each of the next 3 dc. 2dc in next sp just before next bl. ) *Bl, ch2, bl in next ch2 corner sp. Rep between (). Rep from * around. Join w/slst to top of starting bl.
RND 4: Slst into the first ch2 sp. Starting bl, ch2, bl in same sp. (Ch1. 2dc in next ch 1 sp. Ch2. Sk next 2 dc. Dc in each of the next 3dc. Ch2. Sk next 2 dc. 2dc in next sp just before next bobble.) *Bl, ch2, bl in next ch2 corner sp. Rep between (). Rep from * around. Join w/slst to starting bl. Fasten off sage.
RND 5: Join teal in any ch2 corner sp. Starting bl, ch2, bl in same sp. (Ch1. 2dc in next ch1 sp. Dc in each of the next 2 dc. Tr in next skipped st in front of ch2 sp. Tr in next skipped st in behind of ch2 sp. Dc in each of the next 3 dc. Tr in next skipped st behind ch2 sp. Tr in next skipped st in front of ch2 sp. Dc in each of the next 2 dc. 2dc in sp just before next bobble.) *Bl, ch2, bl in next ch2 corner sp. Rep bet (). Rep from * around. Fasten off teal.
But just for the first 4 squares you make. This is also where the square should be 6"x6".
Back: Start with 5th square.
RND 6 & 7: Slst to the first ch2 corner sp. Starting bl, ch2, bl in same sp. (Ch1. 2dc in next ch1 sp. Dc in each st across. 2dc in space just before next bl. ) *Bl, ch2, bl in next ch2 corner sp. Rep bet (). Rep from * around. Join w/slst to starting bl. Fasten off teal.
RND 8: Join sage in any ch2 corner sp. *2sc, ch2, sc in ch2 corner sp. Ch1. 2sc in next ch1 sp. Sc in each st across. 2sc in space just before next bl. Rep from * around. Join w/slst to first sc. Fasten off sage.
RND 9: Join black in any ch2 corner sp. Starting bl, ch2, bl in same sp. (Ch1. 2dc in next ch1 sp. Dc in each st across. 2dc in space just before next sc.) *Bl, ch2, bl in next ch2 corner sp. Rep bet (). Rep from * around. Join w/slst to starting bl.
RND 10-11: Starting bl, ch2, bl in same sp. (Ch1. 2dc in next ch1 sp. Dc in each st across. 2dc in space just before next corner. ) *Bl, ch2, bl in next ch2 corner sp. Rep bet (). Rep from * around. Join w/slst to starting bl. Fasten off. Weave all ends into work on all squares.
Assembly:
On first 4 squares work on row of sc all the way around with black. Work 2sc, ch2, 2sc in each corner.
With wrong sides facing each other and the front facing you, sc the front to the back, through all lps, using Madrid Print. Work 3 sc in each corner. Before closing the pillow, insert pillow form then continue with sc to close. Join w/slst to first sc. Fasten off and weave ends into work.
Note: I made my pillow form and did not firmly stuff it. That way I was able to scrunch the pillow to make it fit. You should be able to make this pillow cover stretch to fit over a purchased 14"x14" pillow form. You can get them from Wal-Mart for $2.50-$3.50 depending on where you live.
Note about instructions: You will discover that there is not a ch1 sp just before each corner set of bobbles but there is one after each set. I did this on purpose.
Design written on Saturday, March 27, 1999. Copyright ©1999-2007 By Julie A. Bolduc p119001

