Harlequin Bolster Pillow

Designed by Julie A Bolduc
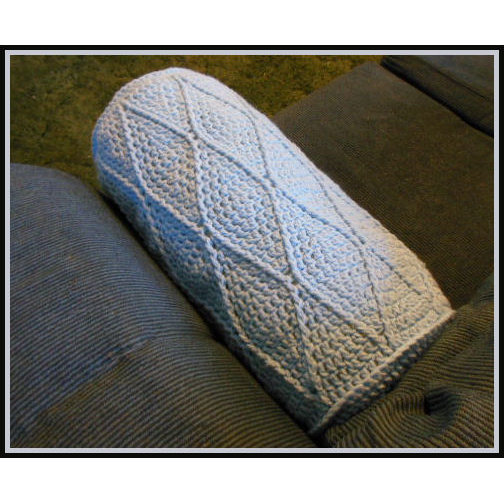
This Pillow pattern was inspired by the Men's Ribbed Hat on this site. The ends are made similar to the first few rounds of the hat. Then the body of the pillow is made to resemble a Harlequin pattern design. It is fun to make and more for the intermediate to advanced crocheter.
Materials Needed
8oz Worsted weight acrylic yarn in Light Blue. Red Heart Super Saver was used in the example.
Size I/9 or 5.50mm aluminum crochet hook
Yarn Needle for weaving in ends
2/3 yard cotton/polyester blend plain white or matching fabric. Or an old standard pillowcase
Sewing thread
Sewing Machine
1 pound polyester fiberfill
Yarn Thickness: 4mm
Gauge: 4dc=1"
Finished Size: 8&qote; x 19"
Skill Level: Intermediate to Advanced
Prepare the Bolster Pillow Insert first then set aside
Step 1: Cut 2 circles 8" in diameter from your fabric. Place a pin in one spot on each circle. These are your starting and ending points when sewing the circles to the large piece of fabric.
Step 2: Cut a piece of fabric 19.25" x 25"
Step 3: Using a 5/8" seam allowance, and starting 5/8" from the end of the large piece of fabric, sew the circles to the 25" sides of the fabric. You may end up with extra when you get to the end so make sure you are starting and ending on the same spot on both circles and both ends of your large fabric piece.
Step 4: Trim any excess fabric from your large piece of fabric if needed.
Step 5: Pin the long ends of your opening together, right sides facing each other. Using a 5/8"e; seam allowance and leaving a gap about 5"e; sew the long sides together.
Step 6: Clip the curves of your circles to reduce bulk. Cut little " V's " around each circle end.
Step 7: Turn work inside out.
Step 8: Stuff tightly.
Step 9: Whip stitch opening closed. Set aside pillow insert for now.
 Crochet Pillow Cover
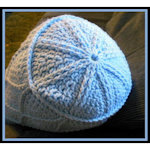
Make 2 end circles the same and set them aside for now.
Special Stitch Used Front post Double crochet (fpdc) Work dc around the post of the stitch indicated.
Decrease: Dec. Yo, insert hook in next st, yo, pull up a loop, yo, pull through 2 lps on hook twice. Yo, pull through all 3 lps on hook.
Crochet Instructions
RND 1: Ch5, join w/slst to first ch to form ring. Ch3. 15dc in ring. (16sts)
RND 2: Ch3, dc in same st as slst. Fpdc in each of the next 2 dc. *2dc in same st as last fpdc. Fpdc in each of the next 2 dc. (32sts)
RND 3: Ch3. Dc in sp before next dc. Dc in next dc. Fpdc in each of the next 2 fpdc. *Dc in next dc. Dc in next sp before next dc. Dc in next dc. Fpdc in each of the next 2 fpdc. Rep from * around. Join w/slst to top of ch3. (40sts)
RND 4: Ch3. 2dc in next dc. Dc in next dc. Fpdc in each of the next 2 fpdc. *Dc in next dc. 2dc in next dc. Dc in next dc. Fpdc in each of the next 2 fpdc. Rep from * around. Join w/slst to top of ch3. (48sts)
RND 5: Ch3. Dc in next dc. Dc in sp before next dc. Dc in each of the next 2 dc. Fpdc in each of the next 2 fpdc. *Dc in each of the next 2 dc. Dc in sp before next dc. Dc in each of the next 2 dc. Fpdc in each of the next 2 fpdc. Rep from * around. Join w/slst to top of ch3. (56sts)
RND 6: Ch3. Dc in next dc. 2dc in next dc. Dc in each of the next 2 dc. Fpdc in each of the next 2 fpdc. *Dc in each of the next 2 dc. 2dc in next dc. Dc in each of the next 2 dc. Fpdc in each of the next 2 fpdc. Rep from * around. Join w/slst to top of ch3. (64sts)
RND 7: Ch3. Dc in each of the next 2 dc. Dc in sp before next dc. Dc in each of the next 3 dc. Fpdc in each of the next 2 fpdc. *Dc in each of the next 3 dc. Dc in sp before next dc. Dc in each of the next 3 dc. Fpdc in each of the next 2 fpdc. Rep from * around. Join w/slst to top of ch3. Fasten off and weave ends into back of work.(72sts)
Large Long Tube
RND 1: Ch 72. Being careful not to twist chain, join w/slst to first ch to form very large ring. Ch3. Dc in each ch around. Join w/slst to top of ch3.
RND 2: Ch3. Dc in each of the next 6 dc. Fpdc in each of the next 2 dc. *Dc in each of the next 7 dc. Fpdc in each of the next 2 dc. Rep from * around. Join w/slst to top of ch3.
RND 3: Ch3. Dc in each of the next 2 dc. Dec 1. Dc in each of the next 2 dc. (Fpdc in next fpdc. Dc in sp just before next fpdc. Fpdc in next fpdc.) *Dc in each of the next 3dc. Dec 1. Dc in each of the next 2dc. Rep from * around. Join w/slst to top of ch3.
RND 4: Ch3. Dc in next dc. Dec 1. Dc in each of the next 2 dc. (Fpdc in next fpdc. 2dc in next dc. Fpdc in next fpdc.) *Dc in each of the next 2 dc. Dec 1. dc in each of the next 2 dc. rep bet () once. Rep from * around. Join w/slst to top of ch3.
RND 5: Ch3. Dec 1. Dc in each of the next 2 dc. (Fpdc in fpdc. Dc in dc. Dc in sp before next dc. Dc in dc. Fpdc in fpdc.) *Dc in next dc. Dec 1. Dc in each of the next 2 dc. Rep bet () once. Rep from * around. Join w/slst to top of ch3.
RND 6: Ch3. (Dec 1. Dc in next dc. Fpdc in fpdc. Dc in dc. 2dc in next dc. Dc in dc. Fpdc in fpdc.) *Dc in next dc. Rep bet () once. Rep from * around. Join w/slst to top of ch3.
RND 7: Ch3. (Dec 1. Fpdc in fpdc. Dc in each of the next 2 dc. Dc in sp before next dc. Dc in each of the next 2 dc. Fpdc in fpdc. ) *Dc in next dc. Rep bet () once. Rep from * around. Join w/slst to top of ch3.
RND 8: Ch2, dc in next dc. Dec made. (Fpdc in fpdc. Dc in each of the next 2dc. 2dc in next dc. Dc in next dc. Fpdc in fpdc.) *Dec 1. Rep bet () once. Rep from * around. Join w/slst to first dc.
RND 9: Ch1. Fpdc in fpdc. (Dc in each of the next 3dc. Dc in sp before next dc. Dc in each of the next 3dc.) *Fpdc in fpdc. Rep bet () once. Rep from * around. Join w/slst to first fpdc.
RND 10: Slst into the next dc. Ch3. Dc in each of the next 6dc. (Fpdc in each of the next 2 fpdc.) *Dc in each of the next 7 dc. Rep bet () once. Rep from * around. Join w/slst to top of ch3.
RND 11-34: Rep RND 3-10 three times more. At the end of RND 34. Fasten off and weave ends into back of work.
Final Assembly
Join one circle to one end of tube being careful to line up the Fpdc stitches and making sure you are working with wrong sides facing each other and work through both layers at the same time. Work a round of Sc stitches in each st around. Join w/slst to first sc.
Insert prepared bolster pillow and join the other circle to the other end by repeating what you did with the first end.
Design written on Friday, January 25, 2013. Copyright ©2013 By Julie A. Bolduc f119004

