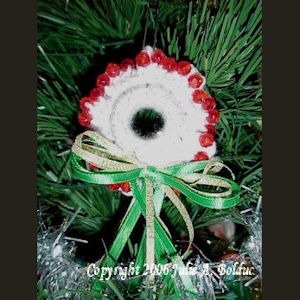
Beaded Tape Core Wreath
 Designed By Julie A. Bolduc
This wreath is made almost the same way as the very first pattern I ever designed. It is made with an empty plastic ring from the core of a roll of transparent tape. So if you have any of those empty tape cores around and you do not want to throw them away, you can make these wreaths very quickly and give them out as gift toppers.
Materials Needed
Small amount white worsted weight acrylic yarn or desired color
27 red clear round faceted beads 8mm in size
1 empty plastic transparent tape core ½" thick
1/8" wide gold lame ribbon 18" long
¾" wide green satin ribbon 18" long
Plain white twist tie 1½" long.
Size H/8 or 5mm aluminum crochet hook
Yarn Needle
Wire ornament hanger or paper clip
Yarn Thickness: 4mm
Gauge: 4sc=1"
Finished Size: 4" diam
Skill Level: Beginner
Special Stitch. Beaded Dc. (bdc) This puts a bead on the center of the dc.
Yo, insert hook in stitch indicated, yo, pull yarn through stitch, yo, draw through 2 loops on hook, bring up a bead, yo draw through last 2 loops on hook.
InstructionsString on all beads with needle.
RND 1: Tie yarn onto core. Ch1. Work 18sc in core ring. Join w/slst to first sc.
RND 2: Ch3. Work 3 bdc in next sc. Ch2. *Sc in next sc. Ch2. Work 3 bdc in next sc. Ch2. Rep from * around. Join w/slst to first ch of ch3. Fasten off, weave ends into back of work.
Bow: Cut a 8" piece of both ribbons, set aside. Wrap the rest of the ribbon around the palm of your hand 2 times. Use the 8" pieces to tie around the center to form a bow keep the knot a little loose. Slip the twist tie under the tied ribbons on the back side of the bow. Tighten the knot to secure the twist tie. Attache the bow to the wreath covering the starting point of the wreath. Twist the ends of the twist tie on the back side. Attach hanger or paper clip to the top
Design written on Friday, December 17, 1999. Copyright ©1999 By Julie A. Bolduc p103017

