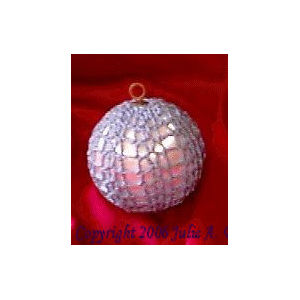
Vst Mesh Ball Ornament
 Designed By Julie A. Bolduc
This ball ornament is made with a white satin covered 2 ½" ball. It is covered with a country blue crocheted mesh which has a combination of Vsts and ch 3 nets sts.
Materials Needed:
1 2 ½" white satin covered Christmas ball.
Small amount South Maid size 10 crochet cotton in Country Blue
Size 7 Steel Crochet hook
Tapestry needle
Thread Size: 10thread
Gauge:8sc=1"
Finished Size: =2½" diameter
Skill Level: Beginner
Instructions
Pay close attention to the minor differences from RND 9 through RND 11.
RND 1:Ch 18, join with slst to first ch to form ring. Ch 8, sc in ring. Repeat from beg till you have 8 loops but sl st in the first ch of the first ch 8 lp.
RND 2: Ch 6, *Vst in ch 8 lp, ch 3, dc in sc, ch 3. Repeat from * around. Join with sl st in 3rd ch of ch 6.
RND 3: Slst to the 2nd ch in the first ch 3 sp. Sc in same sp. Ch3, *Vst in Vst, ch3, sc in ch3 sp, ch3, sc in ch3 sp, ch 3. Repeat from * around. Join with slst in first sc.
RND 4-9: Slst to the 2nd ch in the first ch 3 sp. Sc in same sp. Ch3, *Vst in Vst, ch3, sc in ch3 sp, ch3, sk ch3 sp, sc in next ch3 sp, ch 3. Repeat from * around. Join with slst in first sc.
Slip ball into work with the hanger of the ball to the large open end. Work on the ball from here to end.
RND 10: Slst to the 2nd ch in the first ch 3 sp. Sc in same sp. Ch3, *Vst in Vst, ch3, sc in ch3 sp, ch2, sk ch3 sp, sc in next ch3 sp, ch 3. Repeat from * around. Join with slst in first sc.
RND 11: Ch 3. *Dc in Vst, dc in ch 3 sp, sk ch2 sp, dc in ch 3 sp. Repeat from * around. Join with slst in top of ch3. Fasten off and leave a 8" length of thread.
With Tapestry needle, work a running stitch through all stitches around and gather up stitches around the hanger and secure thread and trim off.
Put beginning thread onto needle and do the same thing as with the top drawing up the stitches tightly to close. Secure thread and trim off.
Design written in April 1998 Copyright © 1998 by Julie A. Bolduc p103002

