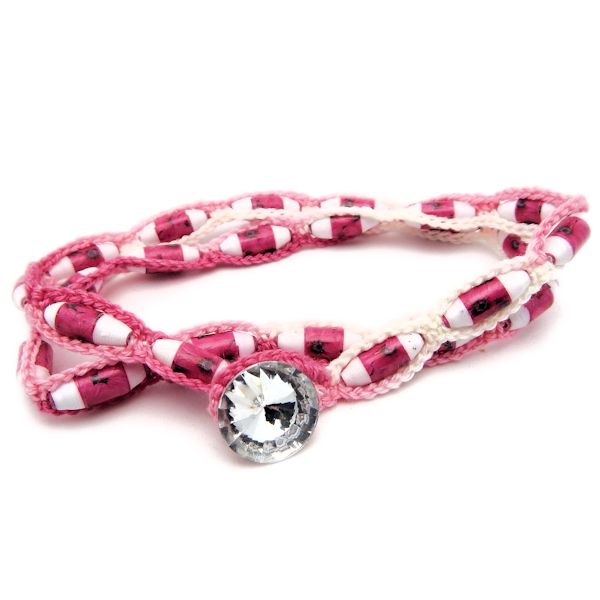
Paper Bead Wrap Bracelet

Designed By Julie A. Bolduc
This bracelet is made with crochet cotton and paper beads. You can use any beads you want as long as the you can thread the chain through the hole. To wear this bracelet, wrap it around your wrist, as many times as needed, and push the button through the loop. If it is too long, you can pass the button through one of the chains along side a bead if the chain is long enough. You can also use it as a necklace or anklet as well.
Watch the Video at YouTube!
Download the Main PDF File Here
Download the Bead Sheet and Cutting Template PDF files Here
- Materials Needed
- Size 10 Crochet Cotton in any color
- 30-100 beads of any size with a 5/64" hole
- 1 Shank Style button
- Size 7 Steel Crochet Hook
- Tapestry Needle that fits through hole in bead and button.
- Mini Binder Clip or extra bead
Yarn Thickness: 10thread
Gauge: 8sc = 1"
Finished Size: Variable x 3/8"
Skill Level: Intermediate
Instructions
Step 1: Leaving a tail about 12" long, make a chain long enough to wrap around your wrist 2-5 times loosely. Not tight. Slip St in 20th ch from hook. Put hook down, pick up tapestry needle, weave the starting end into needle and string on all beads onto your starting chain. Place a binder clip or tie an extra bead, at the end of the beads so the beads won't fall off when you work on the bracelet.
NOTE: In this next step, you might want to have a piece of paper and a pencil ready. If each bead is a different size, as you work in each bead, write down how many chains you need for each bead. Then when you work the chains back up the other side, just follow your numbers in reverse.
Step 2: Make a chain long enough to go to the opposite end of your first bead, from 3 to as many stitches as needed without stretching too much. Stretch out the starting chain from inside the bead, to expose some stitches that may be hidden in the bead, so you can keep as many beads on your chain as possible. Sc in each of the next 2 chains in only the back loop. Repeat this step for all of the beads you strung on your chain. If you run out of chain, just remove the remaining beads. Make sure to leave enough room at the end so you have 2 chains. Sc in each of the last 2 chains. Ch1, turn.
Step 3: Sc in the unworked loops on the opposite side of the starter chain. Sc in each of the first 2 chs. Ch as many as you need, following the numbers you wrote down, to get to the opposite side of your bead. Sc in each of the next 2 chains. Repeat for each bead back up to the large loop.
Step 4: You should now be back to the large loop. Work as many sc as you need to fill the loop. Slst in next sc to join. Fasten off. Weave this end into work.
Step 5: Using the 12" tail at the other end, and a needle slim enough to fit through the shank on your button, sew the button to the end of the bracelet. Weave end into work and fasten off any extra thread you may have. You might want to put a dab of glue at the end of the thread to help keep it in place.
Design written on Friday March 27, 2015. Copyright ©2015 By Julie A. Bolduc f107013

