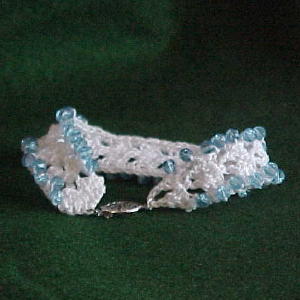
Beaded Mile-A-Minute Bracelet

Designed By Julie A. Bolduc
This bracelet is fast and fun to make and would look wonderful with many different color combinations of thread and beads. Imagine one made with green and red beads for the holidays.
Materials Needed
Small amount white size 10 crochet cotton. Southmaid was used in the example
60 4mm faceted clear beads of any color
Size 7 or 1.65mm steel crochet hook
Tapestry needle fine enough to go through the beads
2 jump rings
1 clasp of desired style
2 pairs of jewelry pliers or other small pliers
Yarn Thickness: 10thread
Gauge: 10sc = 1"
Finished Size: 7"x¾"
Skill Level: Beginner
Instructions
String all beads on first.
ROW 1: Ch6, sc in 2nd ch from hook. Dc in next ch. Dc, ch3, dc in next ch. Dc in next ch. Sc in last ch. Ch4, turn.
ROW 2: Sc in next ch3 sp. Ch1. Dc in top of sc. Ch1, turn.
ROW 3: Sc in top of dc. Dc in next ch. Dc, ch3, dc in next sc. Dc in next ch. Sc in next ch. Ch4, turn.
ROWs 4-30: Repeat rows 2 & 3 until you reach row 30. Do not fasten off. Now add the beads.
Working down the left side, *sc in next ch3 sp, bring up a bead, sc in same sp. Sc in next row, bring up a bead, sc in same sp. Rep rom * to the end. 2sc in corner sp. Sc in each st across bottom. 2sc in next corner. Sc in next row, bring up a bead, sc in same sp. **Sc in next row, bring up a bead, sc in same sp. Rep from ** to the end. Fasten off & weave ends into work.
Attach jump rings and clasp to the ends of bracelet with pliers.NOTE: This beaded bracelet started out as an edging. About 10 minutes into working it, I realized it's true identity had to be a bracelet. Then I got the bright idea to add beads so instead of frogging what I had done, I finished the main part of the bracelet, cut the thread, put the beads on the thread, then continued to finish it. Well anyway, be sure to string the beads on first. That way you will not have to weave in more ends than you really have to.
Design written on Sunday, September 14, 2003. Copyright ©2003 By Julie A. Bolduc f107009

