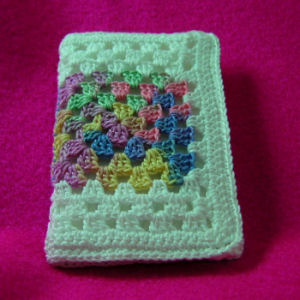
Granny Needle Case
 Designed By Julie A. Bolduc
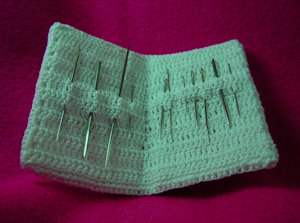
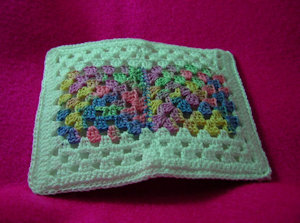
This needle case is made from thread and is a fairly advanced project to make. It uses a recycled plastic milk jug inside to keep it's shape. It is just the right size to hold sewing, embroidery and yarn needles. Click on each of the smaller images to see the larger versions.
Materials Needed
Size 10 crochet cotton in white.
Size 10 crochet cotton in a multicolor.
Size 7 steel crochet hook
1 business card
2 pieces of plastic bigger than the business card. (plastic milk jug)
Tapestry Needle


Yarn Thickness: 10thread
Gauge: 8sc = 1"
Finished Size: 4.75" x 3.75"
Skill Level: Advanced
Instructions
RND 1-4: Granny Squares first Using the multicolored thread, use the Basic Granny Square pattern. Fasten off and weave ends into back of work. Stitch the 2 squares together along one edge only.
Sides:
ROW 1: Lay the piece in front of you so the short ends are on the left and right. Join white to the top right corner sp. Ch3, 2dc in same sp. Ch1, 3dc in next ch1 s, 3 times. Ch1. 3dc in each of the next 2 ch2 sps. Ch1, 3dc in next sp, 3 times. Ch1. 3dc in next ch2 corner sp. Ch3, turn.
ROW 2: 3dc in next ch1 sp, ch1, 4 times. Sk 2 dc. Dc in each of the next 2dc. Ch1. Sk 2 dc. 3dc in next ch1 sp, ch1, 3times. 3dc in next ch1 sp. Dc in top of ch3. Ch3, turn.
ROW 3: 2dc in sp just before next dc. Ch1, 3dc in next ch1 sp, 8 times. 3dc in top of ch3. Ch1, turn.
ROW 4 & 5: Sc in each st across, ch1 turn. Fasten off and Repeat ROWs 1-5 on other side. Fasten off and weave ends into back of work.
Short Sides: Place piece in front of you so the long sides are on the left & right. Join white to sc at top right corner.
ROW 1: Ch3, 2dc in same st. Ch1. 3dc in next sp, ch1, 7 times. 3dc in last sc on end. Fasten off. Repeat with other end. Fasten off and weave ends into back of work.
Continue with short sides.
With the right side facing you, join thread to top of ch3. Ch3, dc in each st across. Fasten off and repeat with other end. Set piece aside.
ROW 1: Inside Panel
Ch46. Sc in 2nd ch from hook and in each ch across. Ch3, turn.
ROW 2-16: Sk first st. Dc in each st across and in top of ch3. Ch3, turn. At the end of row 16, ch1, turn.
ROW 17: Sc in each st across. Fasten off and weave ends into back of work.
Assembly:
STEP 1: Place both pieces together wrong sides facing each other. Lay down in front of you so the short sides are on the left and right. Work a row of sc around 3 edges starting at the top right corner. Cut 2 plastic pieces the same size as the business card and insert them into your work so they are side by side. Continue to stitch the last edge closed.
STEP 2: Fold whole thing in half along the center stitch line of where the granny squares were stitched together. Work a running stitch along this center line to form a crease. Fold in half so the colorful side is on the outside.
STEP 3: Insert needles through stitches on the inside to store your needles.
Design written on Monday, April 17, 2006. Copyright ©2005 By Julie A. Bolduc

