
Christmas Countdown Blocks
 Designed By Julie A. Bolduc
These blocks can help you count down the days until Christmas! They an also be used during the whole month of December staring on December 1 through New Years Eve. They are made with 2" x 2" x 2" little gift boxes that have been stuffed with rocks for weight. The boxes were then covered in clear shipping tape to make them secure and solid.
Materials Needed
2 small gift boxes 2" x 2" x 2"
pebbles to fill boxes
1.88" wide shipping tape
PDF file of sheet of numbers
1/8" paper punch
½ Skein Herrschners Holiday Traditional Christmas in Red
1 thermal Laminating sheet or 2 self laminating sheets
Size C2/2.75mm aluminum crochet hook
Yarn Needle for weaving in ends and for stitching together
Yarn Thickness: 3mm
Gauge: 7sc=1"
Finished Size: Tightly fits a 2" x 2" x 2" cube
Skill Level: Intermediate


Instructions
Step 1: Prepare Your Boxes.
1.Assemble your Boxes.2.Fill your boxes with Rocks
3.Close and tape up the outside of your boxes so they are completely covered with tape.
4.Set them aside for now.

- Print the PDF file onto White Card Stock in portrait orientation. This sheet of numbers will make 2 sets of 2 blocks.
- Laminate your sheet using what ever method you choose to whether it is by using a thermal laminating machine or using self laminating sheets.
- Carefully cut out the squares along the dotted lines.
- Punch holes around each square on the black dots.
- Separate them into 4 piles. Each block takes 6 squares. 2 of the piles should have the numbers 0,1,2,3,4,5 and the other set needs to be 0,1,2,6,7,8. The number 6 will also be the number 9.
Step 2: Prepare the Number Squares
- Join red yarn to upper right corner of a square Ch1, 1sc in each of the next 6 holes. *Work 2 sc in corner hole. Sc in each of the next 6 holes. Rep from * around. Join w/slst to ch1. Fasten off leaving an end on 2 squares from each set about 24" long. Cut the ends of the rest of the squares to about 12" long. Weave the starting end into your work and trim close to it.
Step 3: Crochet the Number Squares

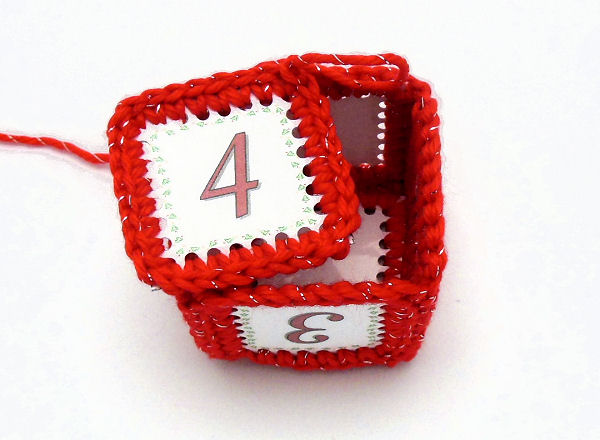
Click on Each Image Above to Enlarge for More Detail
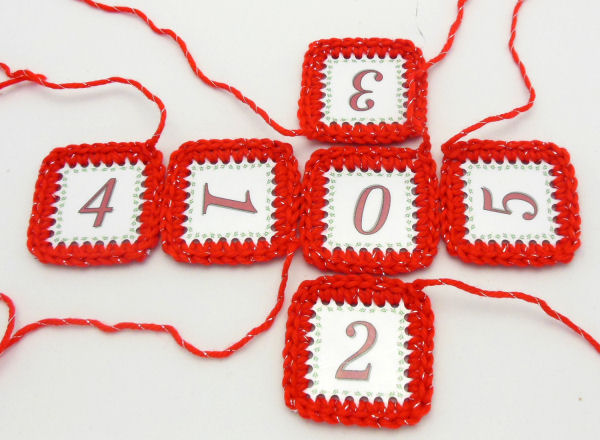
- Arrange one set of squares into a side ways cross. The order does not matter as long as you do not mix your pre separated sets. One of the 2 squares with the 24"e end goes inthe middle and the other one goes on the long end of the cross. The other 4 squares go directly around the center square. Make sure all of the ends of the 4 squares are touching a corner of the center square. As in the first picture.
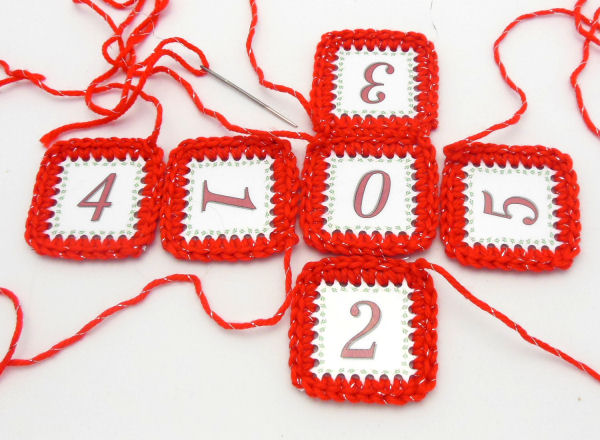
- Starting with the center square and using the center square's 24" end, stitch each of the 4 squares to the center square going all the way around to form the plus sign. Weave the rest of this end in and trim it off.
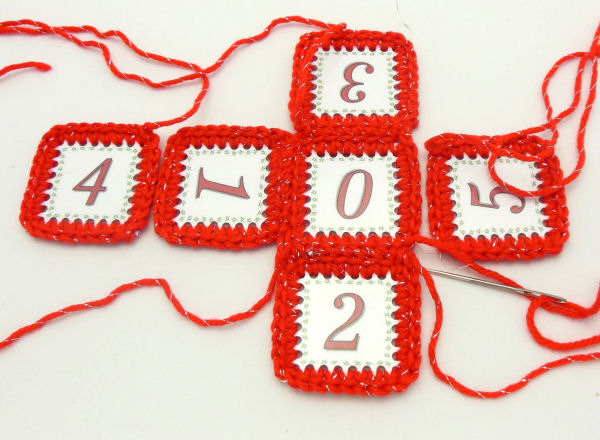
- Now that the 4 sides of the box are sewn to the bottom of the box, it is time to sew each corner up. So with the shorter ends for each corner, whip stitch each corner closed. weave each of these ends into your work and trim as you go.
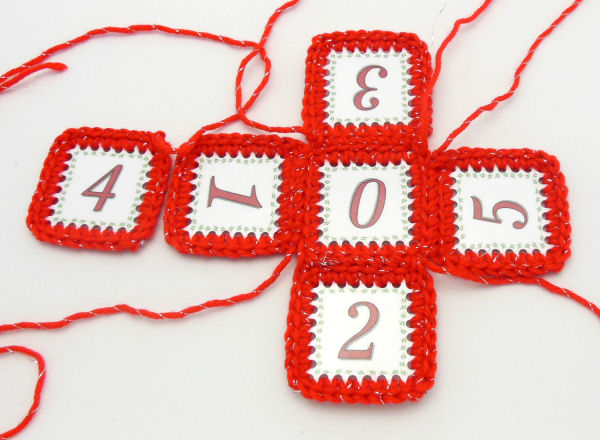
- Now to put the lid on the box! Using the long end of the last square, stitch one side to the top of any of the other 4 squares. Then slip your tape covered, rock filled box inside the box you just made. The stitching may be hard from here, it will be a tight fit. Whip stitch the rest of the way around working extra stitches at each corner to hide the white.
- Repeat these last steps for the rest of your blocks.
- To use them, just start with 25 facing you on December 1 and each day, turn the blocks to reflect how many days left you have until Christmas!
Step 4: Stitch Number Squares Together

NOTE: You can get the little boxes in the wedding section at some Wal-Mart stores. If you cannot find them, perhaps I will add them to my online store.
Design written on Monday, November 11, 2013 Copyright ©2013 By Julie A. Bolduc p115028
All items in our online shop ship free within the US only. I currently offer U.S. shipping only and it is from rural Maine. Delivery can vary from 2–14 days depending on your distance from Maine. Expedited shipping is not available.
Please note: I am now selling all of my paper bead making tools and other items from this web site using Paypal payments.
I have removed all of my paper bead making tools from Amazon. My Kindle crochet pattern books and paper template paperback books continue to be available on Amazon, as they are printed and fulfilled directly by Amazon. A limited number of paper bead making tools remain available on Etsy but I am not linking to those tools from this site.
Random Quick Tip!
Keep Kids BusyMost of us probably have crafting scraps kicking around and not doing anything, well for those of you who have kids, get all of the supplies out and let them make stuff with them while you get some gift wrapping done or some holiday baking done. Don't forget, there will be a few days before the big day where the kids will be at home and bored. Let them go wild and see what they come up with!