
Ribbed Potholder
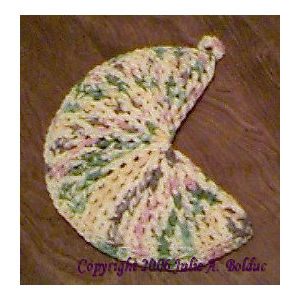 Designed By Julie A Bolduc
This potholder uses the spcecial stitch. The front post double crochet. It is an easy potholder to make and very thick so it will protect your hands very well.
Materials Needed:
3 oz Peaches & Creme Cotton Worsted weight yarn. Of desired color.
Size H/8 or 5mm aluminum crochet hook
Yarn Needle
Gauge: 7dc=2"
Yarn Thickness: =3mm
Finished Size: W8" xL8½"
Skill Level: Beginner
NOTE: You will always be working your dc between stitches so if I say to work a dc in each of the next 3 sps, this is what it means. The whole potholder is worked this way.
See the stitch (Front Post Double Crochet) to see how to do it.
Instructions
RND 1:Ch4, join w/slst to first ch to form ring. Ch3, 13 dc in ring. Join w/slst to top of ch3.
RND 2: Ch3. fpd in first st, then dc in the same st. *Fpd in next st and dc in same st. Rep from * around. What you will have is a fpd and a dc in each st around. This increases the number of stitches from 14 to 28.
RND 3: Slst into the first sp bet the ch3 of rnd 2 and the first fpd. Ch3. *Fpd around fpd. Dc in sp bet fpd and next dc. Dc in next sp bet dc and next fpd. Rep from * around ending with a dc bet the last fpd and dc. Join w/slst to top of ch3.
RND 4: Slst into the first sp. Ch3. Dc in next sp. Fpd in next fpd. *Dc in each of the next 3 sps. Fpd in next fpd. Rep from * around. You will end with a dc in each of the last 1 sp. Join w/slst to top of ch3.
RND 5: Slst into the first sp. Ch3. Dc in next sp. Fpd in next fpd. *Dc in each of the next 4 sps. Fpd in next fpd. Rep from * around. You will end with a dc in each of the last 2 sps. Join w/slst to top of ch3.
RND 6: Slst into the first sp. Ch3. Dc in next sp. Fpd in next fpd. *Dc in each of the next 5 sps. Fpd in next fpd. Rep from * around. You will end with a dc in each of the last 3 sps. Join w/slst to top of ch3.
RND 7: Slst into the first sp. Ch3. Dc in next sp. Fpd in next fpd. *Dc in each of the next 6 sps. Fpd in next fpd. Rep from * around. You will end with a dc in each of the last 4 sps. Join w/slst to top of ch3.
RND 8: Slst into the first sp. Ch3. Dc in next sp. Fpd in next fpd. *Dc in each of the next 7 sps. Fpd in next fpd. Rep from * around. You will end with a dc in each of the last 5 sps. Join w/slst to top of ch3. Do not fasten off.
Perimeter:
Fold holder in half and line up the fpds so they are even. And so that the hook is at your right and the fold is right on a fpd. Now while working on the two inside lps of the stitches, work a sc in each st around to close.
Hanging Loop: When you reach the other side, ch 4 and then slst int any stitch on the holder itself to form a lp. Then turn and work 12 sc in this ch4 lp. Fasten off and weave ends into work, securing the hanging lp to the holder. I wove the ends into the holder itself. This adds strength to the hanging lp.
Designed on Saturday, November 07, 1998. Copyright © 1998 by Julie A. Bolduc p102008
All items in our online shop ship free within the US only. I currently offer U.S. shipping only and it is from rural Maine. Delivery can vary from 2–14 days depending on your distance from Maine. Expedited shipping is not available.
Please note: I am now selling all of my paper bead making tools and other items from this web site using Paypal payments.
I have removed all of my paper bead making tools from Amazon. My Kindle crochet pattern books and paper template paperback books continue to be available on Amazon, as they are printed and fulfilled directly by Amazon. If you would like to shop my Etsy Store, follow the link in the header above.
Random Quick Tip!
Glue Basting SeamsIf you want presicion piecing, without using pins, you can apply tiny dots of glue about a half inch apart along inside the 1/4 inch seam allowance, place your other piece on the glue and dry with a hot dry iron to set the glue. I would use only glue meant for this purpose or Elmer's School glue. These will wash out completely when your quilt is washed. Also you are applying the glue in the seam allowance and because you are using washable glue, your needle, in your machine will not gum up. This is the way I piece my quilts and have never had a problem. The tiny dots of glue, only need to be about the size of a head of a metal pin. Very tiny. This is enough to hold the pieces together while being sewn on the sewing machine.