
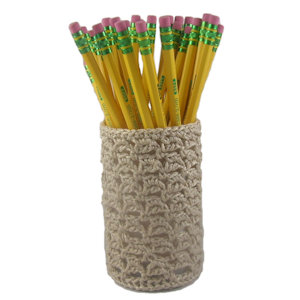
Linked Bumps Pencil Cup
 Designed By Julie A. Bolduc
This pencil cup pattern is made with an empty plastic dry powder drink mix container and uses the bump stitch you can find in the stitches section of the reference area. The pencil cup is fast and easy to make and would make a great addition to any office or desk.
Materials Needed
1 Ball, 2oz Aunt Lydia's Shimmer Fashion yarn in Lt Linen.
1 empty Crystal Light or other container for dry powder drink mix.
Size G/6 or 4mm aluminum crochet hook
Fine yarn needle for weaving in ends
Yarn Thickness: 3mm
Gauge: 6dc 1"
Finished Size: 3"x4.5"
Skill Level: Beginner
Instructions
RND 1: Ch8. Join w/slst to first ch to form ring. Ch3. 19dc in ring. Join w/slst to top of ch3.
RND 2: Ch3. Dc in same st as slst. 2dc in each dc around. Join w/slst top of ch3.
RND 3: Ch1. Sc in same st as slst. Sc in each dc around. Join w/slst to first sc.
RND 4: Working on the back posts, ch1, Sc in each sc around. Join w/slst to first sc.
RND 5: Ch1. Sc in same st as slst. Ch3, dc in 3rd ch from hook. (bump stitch made) Sk 2 sc. *Sc in next sc. Ch3, dc in 3rd ch from hook. Sk next 2 sc. Rep from * around. Join w/slst to first sc.
RND 6: Slst in each of the next 2chs of the first bump stitch. Slst into the ch3 sp of the same bump stitch. 2sc in same sp. Ch1. *2 sc in next ch3 sp of next bump stitch. Ch1. Rep from * around. Join w/slst to first sc.
RND 7: Slst in next sc and in next ch1 sp. Ch1, sc in same sp. ch3, dc in 3rd ch from hook (bump stitch made). *Sc in next ch1 sp. Ch3, dc in 3rd ch from hook. Rep from * around. Join w/slst to first sc.
RND 8-17: Rep RNDs 6&7 consecutively.
RND 18: Rep RND 6.
RND 19: Ch1. Sc in same st as slst. Sc in next sc. Sc in next ch1 sp. *Sc in each of the next 2 sc. Sc in next ch1 sp. Rep from * around. Join w/slst to first sc. Fasten off and weave ends into back of work. Slip work over bottom of plastic container. The cover is removable so it can be washed. You can secure it with hot glue at the top of the rim if you like.
Design written on Sunday, June 27, 2010. Copyright ©2010 By Julie A. Bolduc f117004
All items in our online shop ship free within the US only. I currently offer U.S. shipping only and it is from rural Maine. Delivery can vary from 2–14 days depending on your distance from Maine. Expedited shipping is not available.
Please note: I am now selling all of my paper bead making tools and other items from this web site using Paypal payments.
I have removed all of my paper bead making tools from Amazon. My Kindle crochet pattern books and paper template paperback books continue to be available on Amazon, as they are printed and fulfilled directly by Amazon. A limited number of paper bead making tools remain available on Etsy but I am not linking to those tools from this site.
Random Quick Tip!
What to do With SnowflakesSnowflakes and other thread motifs make wonderful appliques for shirts, tablecoths, pillows, quilts, napkins and more! This takes time but all you need to do is position the motif where you want it to be and with matching sewing thread, tack them down using very small stitches about 1/4" apart. There is another way of doing this as well and that is using Ok to Wash it glue from Aleene's. Just brush the glue on the back side of the motif and position it where you want it to be. When it is dry, just tack it down around the outer edges for added security. Imagine a bunch of white snowflakes appliqued to a sky blue tablecoth!