
Two in one Pattern
Designed By Julie A. Bolduc
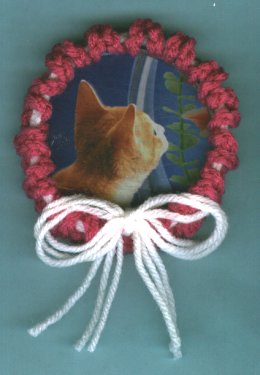
This pattern can be used as a coaster or as a picture frame fridgie depending on how you finish it. I used a picture cut out of a magazine and glued it to a piece of cardboard cut from a box of margarine sticks. Please Recycle!
Materials Needed
For Coaster
Small amount worsted weight yarn Red Heart Acrylic in Raspberry was used.
For Picture Frame Fridgie
Same yarn as above.
Plastic Lid from a Potatoe Chip Can
White yarn Scrap Worsted Weight Yarn.
Scissors
Pencil
Magnet Sheet cut into a 2" circle
Hot Glue
Yarn needle for weaving in ends.
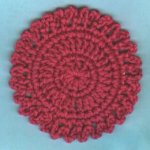
Gauge: 4sc=1"
Yarn Thickness 3mm
Finished Size: 5"diameter
Skill Level: Beginner
Instructions
RND 1: Ch3, work 10 dc in 3rd ch from hook. Join w/slst to first dc.
RND 2: Ch1. Sc in same st as slst. 2sc in each dc around. Join w/slst to ch1.
RND 3: Ch3. 2dc in next sc. *1dc in next sc. 2dc in next sc. Rep from * around. Join w/slst to top of ch3.
RND 4: Ch1 sc in same st as slst. 2sc in each dc around. Join w/slst to ch1.
RND 5: Ch6. *Sk next sc. Sc in next sc. Ch5. Rep from * around. Join w/slst to first ch of ch6. Fasten off.
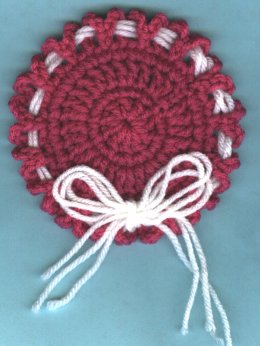
Use 3 Strands of white yarn 28" long on a yarn needle. Weave the 3 strands all at once around the perimeter so that the ends come out on the right side. Do not tighten. Just tie in a bow.
Now finished as a coaster. Make several in different colors!
Now to make the Picture frame. Using the lid as a template, trace and cut out a circle of thin cardboard and a picture the same size. You need to cut inside the line you made. You may have to trim it to fit.
Glue the picture to the cardboard. If you are using a photograph, you can use acid free paper and two faced tape if you wish. Tuck the picture into the lid face up so that the image is not covered by the plastic.
Then lay the lid face up on the coaster which should be laying down right side down. Then draw up the 3 strands of yarn to tighten around the rim of the lid. Tie a bow. Glue the magnet to the back.
Design written on Tuesday, July 20, 1999. Copyright©1999 by Julie A. Bolduc all rights reserved. p108014
All items in our online shop ship free within the US only. I currently offer U.S. shipping only and it is from rural Maine. Delivery can vary from 2–14 days depending on your distance from Maine. Expedited shipping is not available.
Please note: I am now selling all of my paper bead making tools and other items from this web site using Paypal payments.
I have removed all of my paper bead making tools from Amazon. My Kindle crochet pattern books and paper template paperback books continue to be available on Amazon, as they are printed and fulfilled directly by Amazon. If you would like to shop my Etsy Store, follow the link in the header above.
Random Quick Tip!
Meat Tray PallettesFoam meat trays can be used a palettes for paint or glue. When done with your project, just throw away or if you have extra paint on it, cover with plastic wrap so that you will not waste any of it. Then when all of the paint is used up, then you can toss it.