
Sweet Little Angel
 Designed by Julie A. Bolduc
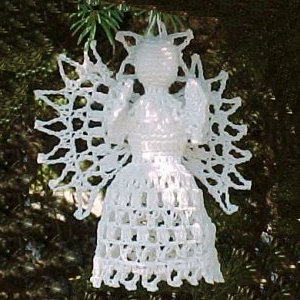
This little angel would look great on your tree or even as a decorative accent piece of your holiday decorating. If you notice, the wings and halo are made to match the bottom part of skirt!
Materials Needed
America's Best Crochet Cotton in white.
size 7 steel crochet hook
white glue, & water
Rust proof pins
foam board, waxed paper
plastic bags, I used empty bread bags
Yarn Thickness: 10thread
Gauge: 10sc-1"
Finished Size: 4" high
Skill Level: Intermediate
Special Stitches Used.
Bobble (bl)
Yo, insert hook in stitch indicated, yo, pull up a loop, yo, draw through 2 lps on hook, *yo, insert hook in same stitch, yo, pull up a loop, yo, draw through 2lps on hook rep from * until you have 4 lps on hook. Yo and pull through all 4 lps on hook.
Inverted V Stitch (iVst)
Yo, insert hook in first st indicated, yo, draw up a loop, yo, draw through 2 lps on hook. Yo, insert hook in next stitch or place indicated, yo, draw up a loop, *yo, draw through 2 lps on hook. Rep from * until you have just one loop left on hook.
Instructions
Head
RND 1: Ch 2, work 8 sc in 2nd ch from hook. Join w/slst to first sc.
RND 2: Ch1. Sc in same st as slst. 2sc in each sc around. Join w/slst to ch1. (16sc)
RND 3: Ch1. Sc in same st as slst. 1 sc in next sc. *2sc in next sc. 1 sc in next sc. Rep from * around. Join w/slst to ch1. (24sc)
RND 4: Ch1. Sc in same st as slst. 1sc in each of the next 2 sc. *2sc in next sc. 1sc in each of the next 2 sc. Rep from * around. Join w/slst to ch1. (32sc)
RND 5-8: Ch1. Sc in each sc around. Join w/slst to ch1.
RND 9: Ch1. Sc in next sc. Sk next sc. *Sc in each of the next 3 sc. Sk next sc. Rep from * around. Join w/slst to ch1. (24sc)
RND 10: Ch1. Sk next sc. *Sc in next 2sc. Sk next sc. Rep from * around. You will sk last st. Join w/slst to ch1. (16sc)
RND 11: Ch1. Sk next sc. *Sc in next sc. Sk next sc. Rep from * around. Join w/slst to ch1. (8sc) Stuff head with pieces of a cotton ball.
Neck
RND 12: Ch3. Work 1dc in each sc around. Join w/slst to top of ch3. (8dc including ch3.)
RND 13: Ch4. Dc in same st as slst. Dc, ch1, dc in each dc around. Join w/slst to 3rd ch of ch4. (8 ch1 spaces.)
Read this next row carefully. There are two places where you will ch4 instead of ch2. These are shoulder areas.
RND 14: Slst into the first ch1 sp. Ch5, dc in same sp. Dc, ch2, dc in next ch1 sp. Dc, ch4, dc in next ch1 sp. Dc, ch2, dc in each of the next 2 ch1 sps. Dc, ch4, dc in next ch1 sp. Dc, ch2, dc in each of the last 2 ch1 sp. Join w/slst to 3rd ch of ch5.
RND 15: Slst into the first ch2 sp. Ch3, 3dc in same sp. 4dc in next ch2 sp. Dc, ch1, 8 times in next ch4 sp. Work 1 more dc in same sp. Work 4dc in each of the next 2 ch2 sps. Dc, ch1, 8 times in next ch4 sp. Work 1 more dc in same sp. Work 4 dc in each of the last 2 ch2 sps.
This next row you will be forming the chest area and forming arm holes. You will be skipping the stitches you worked in the ch4 sp and also 2 dc on either side of the shell.
RND 16: Ch1. Sc in each of the next 7 dc. (Sk all of the stitches worked in the ch4 sp.) Sc in each of the next 8dc. Rep between () once. Sc in each of the next 4 dc. Join w/slst to ch1. You should now have 24 sc around.
This next row, you will be decreasing under the arms to start forming the lower torso toward the waist.
RND 17: Ch3. Dc in each of the next 3 sc. (yo, insert hook in next st, yo, draw up a loop, yo, draw through 2 lps on hook. Insert hook in next st, yo draw up a loop, yo, draw through2 lps, yo and draw through 3 lps on hook. Dec made. Dec one more. Dc in each of the next 8sc. Dec 2. Dc in each of the next 4 sc. Join w/slst to top of ch3. You should now have 22 stitches around.
RND 18: Ch1. Sc in each of the next 3 dc. Insert hook in next st, yo, draw up a loop, insert hook in next st, yo, draw up a loop, yo draw through all 3 lps on hook. (Sc-dec made.) Sc in each of the next 8 dc. Sc-dec 1. Sc in each of the next 4 dc. Join w/slst to ch1. You should now have 20 stitches around.
RND 19: Ch3. Dc in each sc around. Join w/slst to top of ch3.
RND 20: Ch4. Dc in same st as slst. Dc, ch1, dc in each dc around. Join w/slst to 3rd ch of ch4.
RND 21: Slst into the first ch1 sp. Dc, ch2, dc in each ch1 sp around. Join w/slst to 3rd ch of ch 5.
RND 22: Slst into the first ch 3 sp. Ch3. Work a bobble but only until you have 3 lps on hook. Ch2. *Bl in next ch3 sp. Ch2. Rep from * around. Join w/slst to top of first bl.
RND 23: Slst into the first ch2 sp. Ch2, dc in next ch2 sp. *Work an iVst starting in the same sp as the last stitch and finishing it in the next ch2 sp. Ch3. Rep from * around. Join w/slst to first dc. Not in the ch2.
RND 24: Rep rnd 22.
RND 25: Rep rnd 23.
RND 26: Ch1. Dc in first ch3 sp. Ch5, slst in 3rd ch from hook. Ch2. Dc in same ch3 sp as last dc. *Sc in next iVst. Dc in next ch3 sp. Ch5. Slst in 3rd ch from hook. Ch2. Dc in same ch3 sp as last dc. Rep from * around. Join w/slst to ch1. Fasten off. Weave ends into work.
Arms
Start on left side. Join thread to first skipped dc. Ch5, dc in same st. Sk next st. *Dc, ch2, dc in next dc. Rep from * 8 times more. Sk next dc. Dc, ch2, dc in last skipped st. Join w/slst to 3rd ch of ch5. Fasten off and then repeat with other side. Weave ends into back of work.
Wings
RND 1: Ch 6 join w/slst to first ch to form ring. Ch5. *Dc in ring. Ch2. Rep from * 9 times more so that you have 10dc and 10 ch2 sps around. Join w/slst to 3rd ch of ch5.
Now you will work each side of the wings in rows.
ROW 1: Slst into the first ch 2 sp. Ch3. Work a bobble but only until you have 3 lps on hook. Ch2. *Bl in next ch2 sp. Ch3. Rep from * across. Ch5, turn.
ROW 2: Dc in top of last bobble made in prev row. Dc, ch3, dc in each ch3 sp across and in the last bobble in row. Ch5, turn.
ROW 3: *Bl in next ch3 sp. Ch2. Rep from * Across. You should now have 6 bobbles across. Ch5 turn. Ch3. *Work an iVst starting in the next ch3 sp and finish it in the next ch3 sp. Ch3. Rep from * across. Dc in same sp as last iVst. Ch1, turn.
ROW 4: *Dc in first ch3 sp. Ch6. Slst in 3rd ch from hook. Ch3. Dc in same sp as last dc. Sc in next iVst. Rep from * across but in the last one, sc in 3rd ch of ch5. Fasten off.
Other side. turn the wing over so that the back side is facing up and the unworked spaces of the staring ring is up. Join thread in first ch2 sp on right hand side. Repeat as for other side. Fasten off and weave ends into back of work.
Halo
RND 1: Ch 4, join w/slst to to first ch to form ring. Ch5. *Dc in ring. Ch2. Rep from * 4 times more. Join w/slst to 3rd ch of ch5.
RND2: Ch1. (Dc in next ch2 sp. Ch5, slst in 3rd ch from hook, ch2. Dc in same sp.) *Sc in next dc. Rep bet (). Rep from * around. Join w/slst to ch1. Fasten off and weave ends into work.
Stiffen the skirt only of the main piece and the wings, and halo with 1 part glue mixed with 1 part water.
Cover the foam board with waxed paper.
Dip the skirt only into the glue mixture. Use a paper towel to pat off the excess glue. Do not wring the skirt. Stuff the plastic bag up the skirt to shape it the way you want it to look. Then find a small jar with a top small enough to drape the skirt over. I used an empty marischino cherry jar with the lid removed. You may need to play around with it until it is the shape you want it to be.
Dip the wings into the mixture and dab the excess glue mixture off with paper towel. To make the wings so that they are not flat, crumple up a piece of plastic wrap or waxed paper and place under the center of the wings to lift up the center a little. Then pin the picots of the wings to the foam board. Of course you will need to stretch it into the shape you want.
Then dip the halo into the mixture and repeat as for the wings but without the plastic under it as you did for the wings. Pin into place.
Allow all pieces to dry overnight. I find that if you use the pilot light in a gas oven, your pieces will dry quicker.
Glue the wings and halo on with hot glue or something that is strong. I used model glue. Attach hanger of choice to top of head. I used a paper clip.
Design written on Wednesday, August 25, 1999. Copyright © 1999 By Julie A. Bolduc p104003
JPF Crochet Club where Crocheting is Just Plain Fun http://www.jpfun.com This pattern is for personal use only and not to be resold.All items in our online shop ship free within the US only. I currently offer U.S. shipping only and it is from rural Maine. Delivery can vary from 2–14 days depending on your distance from Maine. Expedited shipping is not available.
Please note: I am now selling all of my paper bead making tools and other items from this web site using Paypal payments.
I have removed all of my paper bead making tools from Amazon. My Kindle crochet pattern books and paper template paperback books continue to be available on Amazon, as they are printed and fulfilled directly by Amazon. A limited number of paper bead making tools remain available on Etsy but I am not linking to those tools from this site.
Random Quick Tip!
Storing Laminated TemplatesIf you have some of my Laminated marking templates for making paper beads, you can punch holes in them on one side for storing in a three ring binder. The holes should not interfere with being able to mark your papers.