
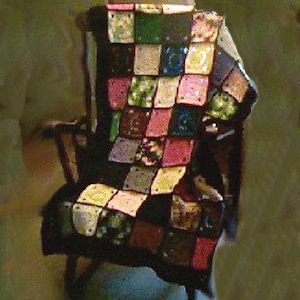
Joshua's Afghan
 Designed By Julie A. Bolduc
This afghan is made for my son Joshua who was 13 at the time this pattern was created. I started the squares sometime in 1993 and put it away until early in 1998. I decided to make an afghan out of the squares in June and I just started to put them together on the first of December. I finally finished it on December 5, 1998.
Materials Needed:- Various scraps of Red Heart Worsted weight yarn as many colors as you want.
- 11oz Red Heart Worsted weight yarn in black or color of choice.
- Yarn Needle for weaving in ends
- Yarn Thickness 4mm
- Gauge: 4sc=1"
- Finished Size: =approx 40"x50"
- Skill Level: Intermediate
The assembly of the squares is done differently than any other method I have seen. You may have seen it but I have not.
I used the wagon wheel pattern for the square but you could use any granny square pattern you want as long as the squares are 5"x5" so that you will have enough of the 11oz of yarn to assemble and finish the afghan.
Instructions
Here is the pattern for the wagon wheel square that I used.
Make 54.
RND 1: Ch6, join w/slst to first ch to form ring. Ch3, 11dc in ring. Join w/slst to top of ch3.
RND 2: Ch4. *Dc in next dc. Ch1. Rep from * around. Join w/slst to 3rd ch of ch4.
RND 3: Slst into the first ch1 sp. Ch3, 2dc in same sp. Work 3 dc in each ch1 sp around. Join w/slst to top of ch3.
RND 4: Slst in the first 2 dc. Sc in next sp between the 3dc groups. *[(Ch3, sc in next sp between the 3dc groups.) Rep bet () two times more. ] Ch5. Sc in next sp. Rep from * around. Rep bet [ ] one more time. Join w/slst to first sc.
RND 5: Slst into the first ch3 sp. Ch3, 2dc in same ch3 lp. Work 3dc in each of the next 2 ch3 lps. *Work 10 dc in ch5 lp. Work 3dc in each of the next 3 ch3 lps. Rep from * around. Join w/s/st to top of ch3. Fasten off and weave ends into work.
Assembley
You will be crocheting the squares together.
First you will be working in rows from right to left until you have 9 rows of 6 squares put together. Then you will be crocheting the columns together from top to bottom always working in the same direction. Here is how you will do it.
Pick up the first two squares. Put them together wrong sides facing each other. Join Black yarn on the top right corner and sc in each st across working in the inside lps only. Then Ch2 and repeat with next two squares. Do this until you have joined 6 squares across the row. Fasten off and then start new row. Start new row on the right and work to the left in the same way.
Then to work the next row and the following 6 rows, Join the new square to the first square on the previous row and repeat as for the first row. See diagram to see the order in which you should join the rows then the columns.
Work the columns in the same way. Fasten off. You will weave the ends into the perimeter after you are done with the afghan.
After all of the squares are joined completely, work the outside border in the following way.
RND 1: Join black yarn in one of the corners of the afghan. The same place as you joined each square. Work sc in each st around working a ch1 at each joint and 2sc, ch2, 2sc in each of the 4 corners. Join w/slst to first sc.
RND 2: Ch3. Work a dc in each st around. Work the foll in each corner. 3dc, ch2, 3dc. Join w/slst to top of ch3. You will be working the next 4 rows like a basic granny square. You may need to adjust in the following row to make it come out ok. This afghan is not perfect. It is not meant to be. I had to adjust to make it work. You will be working between the stitches.
RND3: Work a row of 3dc groups all the way around. Generally what you want to do is work the follin each corner 3dc, ch2, 3dc. Along each of the sides, work your 3dc groups in every 3rd sp between stitches. For example work 3dc between next 2 sts. Sk next 3 sts, work 3dc in next sp. Do this all the way around. You may find it does not work evenly. That is ok. It will not show. You may need to skip 2 or 4 stitches for it to work out right for the next round. I had to. This works especiallwell at the end of each side. Make sure to work 3dc, ch2, 3d in each of the 4 corners though.
RND 4-6: Work as for any basic granny work ing the 3dc groups in each sp around and 3dc, ch2, 3dc in each corner.
RND 7: Slst in each st around but work 3sc in each corner. Fasten off and weave ends into work.
Now weave the rows and column ends into the back of the work but work them into the border so that you join the joints of the squares to the outside and close up the little holes that were produced when you worked the first row of sc around the outside.
Here is a special Crochet quote I came up with!
"Sometimes to achieve desired results, you need to weave in alot of ends!"
Design written on Saturday, December 05, 1998. Copyright © 1998 By Julie A. Bolduc p120001
JPF Crochet Club where Crocheting is Just Plain FunThis crochet pattern is for personal use only and is not to be resold.
Sheetworks Studio Version 2.5 — Free Download! - Two New Categories Added, Graph Paper and Quilt Blocks
All items in our online shop ship free within the US only. I currently offer U.S. shipping only and it is from rural Maine. Delivery can vary from 2–14 days depending on your distance from Maine. Expedited shipping is not available.
Please note: I am now selling all of my paper bead making tools and other items from this web site using Paypal payments.
I have removed all of my paper bead making tools from Amazon. My Kindle crochet pattern books and paper template paperback books continue to be available on Amazon, as they are printed and fulfilled directly by Amazon. A limited number of paper bead making tools remain available on Etsy but I am not linking to those tools from this site.
Random Quick Tip!
Keeping ProjectsClean Keep your WIP in a plastic zipper bag when you take it with you to work on when you are away from home whether you are in a waiting room or at the beach. hehe This keeps it clean and all together.